• Step-by-step guide for reliable metal roof installation
• Tips to avoid common errors in DIY roofing projects
• Professional insights for ensuring a durable and secure roof
Understanding the Signs: Is It Time for a Metal Roof?
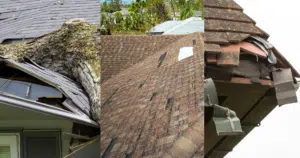
Roofing woes can be a source of stress for any homeowner, but knowing when to take action is critical. Irregularities in your roof’s appearance, such as rust patches or an uneven surface, often hint at underlying issues that need attention. A decline in the performance of your roof, like persistent leaks or drafts, signifies that it’s time for a thorough inspection. It’s essential to tackle these problems promptly to prevent further damage to your property.
When contemplating roof repairs or a full installation, consider the age of your existing roof. Traditional roofing materials have a limited lifespan, and if yours is showing signs of wear like cracked or broken tiles, it’s wise to upgrade to a more durable solution. Metal roofing presents a resilient alternative that withstands severe weather and offers energy efficiency benefits. Keep an eye out for sagging areas or water pooling, as these can lead to more significant concerns if not resolved.
Before embarking on the journey of installing a metal roof, assess the structure beneath. Any form of water damage or rot within the attic or supporting beams can compromise the integrity of the new roof. It’s vital to clear the old roofing materials and rectify any structural issues, to ensure a solid foundation for your new investment. A well-prepared roof is the cornerstone of a successful metal roof installation, ensuring longevity and performance.
Preparing for the Transition to Metal Roofing
As the trend toward sustainable building materials grows, many are turning to metal roofing not only for its eco-friendliness but also for its aesthetic versatility. If you find granule accumulation in gutters or downspouts, it may indicate the erosion of your shingles and the necessity for roof repairs or replacement. Discoloration or streaks on the roofing surface are signs of algae or moss, which thrive on moisture retention and can lead to the degradation of roofing materials. An inspection will determine if a cleaning or more comprehensive measures are required.
Gathering Your Toolkit for Installation
Embarking on the metal roof installation journey requires not just skill but the right set of tools and materials. High-quality metal panels, underlayment, and fasteners are the backbone of a sturdy roof, and their selection should not be taken lightly. A measure of accuracy is essential; hence, having a reliable tape measure and metal snips at hand will ensure that each cut is precise. Don’t forget sealant and flashing; these are crucial components for weatherproofing your structure.
Remember that the longevity of your roof is as good as the materials used and the meticulousness of the installation process. Secure the underlayment uniformly across your roof to establish a solid, water-resistant base. Each metal panel should be fastened correctly to avoid future issues like leaks or loose tiles, enduring through strong winds and heavy rains. For those who require professional assistance, our expert roofing services are a click away to ensure a seamless and reliable roofing experience.
Installing the Underlayment: The First Defense Against the Elements
The underlayment plays a pivotal role as a barrier, shielding your home from nature’s unpredictability. It’s an invisible yet impactful layer that supports your metal panels and provides extra insulation. Rolling it out may seem straightforward, but it’s imperative to ensure no section is skipped and that it’s secured properly with the right adhesives or fasteners. This proactive step is an investment in safeguarding your home against potential water damage and contributes to the longevity of your roof.
Before locking the metal panels in place, you must pay attention to the subtle art of alignment and overlapping. This not only guarantees a pleasant aesthetic but also fortifies the protective characteristics of the roof. Seams and joints should be sealed with a high-caliber sealant to prevent any water ingress. This forward-thinking approach results in a beautiful and enduring finish that is essential for the integrity of your home’s structure and interior.
Step 1: Prepare Your Roof
Ensure your roof is ready for installation. Clear the area of any debris or old roofing materials. Check for and repair any damages to the underlying roof structure.
Step 2: Gather Your Materials
Collect all necessary materials for a metal roof installation including metal panels, underlayment, fasteners, sealant, flashing, and tools like a drill, tape measure, and metal snips.
Step 3: Install Roof Underlayment
Roll out the underlayment across the entire surface of the roof to create a water-resistant barrier. Secure it in place following the product’s specific instructions.
Step 4: Start at the Edge
Begin your metal roofing at the edge that is most visible from the ground. This helps ensure that your roof looks uniform when viewed from a distance.
Step 5: Lay the Metal Panels
Place your first metal roofing panel into position and secure it with the appropriate fasteners. Overlap the edges of the panels as recommended by the manufacturing guidelines.
Step 6: Apply Sealant and Install Flashing
Use a high-quality sealant to prevent leaks at the joints where roofing panels meet. Install flashing around areas prone to water exposure, like chimneys and vent pipes.
Step 7: Add the Finishing Touches
Ensure all edges are trimmed and finished properly to protect against weather and to give your roof a clean, sharp appearance.
Step 8: Inspect Your Work
Review each section of the roof to ensure everything is properly installed. Check for any loose screws, misaligned panels, or areas that may need additional sealant.
Common Mistakes to Avoid During Metal Roof Installation
DIY projects can be rewarding, but when it comes to installing a metal roof, common missteps could turn your hard work into a costly ordeal. Understanding the pitfalls to avoid can save you time, resources, and ensure your roof’s longevity. Here we outline a handful of frequent errors, offering guidance to keep your roofing project on track and watertight.
- Mistake 1: Insufficient Preparation
Skipping the initial roof inspection can miss underlying structural damages, leading to more issues post-installation. Ensure the roof is debris-free and any old materials are completely removed before installation. - Mistake 2: Poor Material Collection
Using subpar materials or forgetting essential items can result in a weak roof. Double-check your list for high-quality metal panels, underlayment, fasteners, sealant, and flashing before commencing work. - Mistake 3: Incorrect Underlayment Installation
Underlayment provides critical protection from the elements; improper installation can negate this. Carefully roll out the underlayment, ensuring full coverage and securing it as the manufacturer directs. - Mistake 4: Not Starting at the Correct Edge
Beginning at the wrong edge can lead to aesthetic and functional problems. Always start at the most visible edge to maintain a uniform look from the ground. - Mistake 5: Misaligning Metal Panels
Inaccurately placed panels can lead to leaks and a compromised roof. Place and secure each panel mindfully, considering the correct overlap as advised by the guidelines. - Mistake 6: Skimping on Sealant and Improper Flashing
Neglecting to use sealant or incorrectly installing flashing can make your roof susceptible to water damage. Use high-quality sealant and ensure proper flashing installation especially around potential leak points. - Mistake 7: Ignoring the Final Details
Leaving edges unfinished or not inspecting the final work can diminish the durability and appearance of your roof. Complete all trimming and review each section for any mistakes or needed adjustments.
Securing the Metal Panels
Laying the metal panels is a pivotal moment in roofing, where precision meets durability. Each panel must be aligned with exactness and secured with fasteners designed for the ultimate grip, safeguarding against the harshest of elements. Overlapping edges as per manufacturers’ specifications ensures a watertight seal, a critical step for robust protection.
Sealant and Flashing: Ensuring Watertight Integrity
Applying a quality sealant is the unsung hero in the quest for a leak-proof roof. It fills the gaps where panels intersect, providing a barrier impenetrable by water. Professional installation of flashing, particularly around protrusions like chimneys and vents, guarantees long-term defense against water intrusion and can be found in our array of services at residential roofing.