• Discover practical signs that indicate your attic needs insulation upgrade.
• Follow an easy step-by-step guide to properly insulate attic roof rafters.
• Learn common DIY insulation mistakes to avoid for a successful project.
Identifying Issues in Your Attic
Your attic is not just an empty space above your house; it’s a crucial component that impacts your home’s energy efficiency and comfort. Before taking steps to insulate your attic roof rafters, it’s important to recognize signs that point to the necessity for insulation upgrade. Look for uneven temperatures throughout your home or a noticeable chill in rooms directly below the attic as these can be telltale signs of insufficient insulation. Additionally, an increase in your heating bills during the winter months is a strong indicator that your attic may be losing valuable heat.
Signs of Moisture and Mold
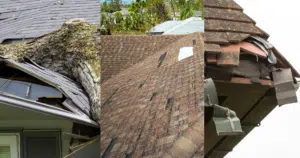
Moisture is an attic’s nemesis; it can deteriorate your home’s structure and significantly reduce the effectiveness of insulation. If you detect musty odors or see visible mold growth, it’s a sign that moisture has infiltrated your attic space. Another hint of excess moisture is if you notice water stains or discoloration on the wood or insulation. It is essential to address these moisture-related issues promptly to prevent more serious damage and to ensure a successful insulation process.
Preparing for Insulation Improvements
Once you’ve noted these problematic signs, it’s vital to clean your attic and clear it of any obstructions or debris before proceeding. During your preliminary assessment, keep an eye out for air leaks around pipes, vents, or the attic hatch, as these will require sealing before new insulation can be installed. Proper attic ventilation is equally important; without it, insulation can trap moisture and lead to the very problems you’re trying to mitigate. By preparing thoroughly, you’re setting the stage for improved energy efficiency and a cozier home through well-executed attic insulation.
Choosing the Right Insulation
When it comes time to select insulation for your attic roof rafters, understanding the different materials available is key to a successful installation. Fiberglass batts, for example, are popular due to their ease of handling and installation. Rigid foam boards offer higher R-values per inch than batts and can be a great choice when space is limited. Whichever material you choose, ensuring it is appropriate for the climate and specific needs of your attic is paramount for maximizing energy efficiency and comfort.
Insulation Material Considerations
As you consider your insulation options, take into account factors such as the recommended R-value for your region and the overall ease of installation. High-quality insulation correctly installed can greatly reduce heat transfer, leading to lower energy bills and a more controlled climate inside your home. It’s also worth considering eco-friendly options that may contribute to a healthier environment, both within your home and globally. If you’re unsure about the best option for your attic, consulting the expertise of professional roofing services can guide you to make an informed decision.
Step 1: Assess Your Attic Space
Before you begin, inspect your attic to understand its layout, venting, and existing insulation condition. Look for any signs of moisture or mold as these issues should be addressed before insulation installation.
Step 2: Choose Your Insulation Material
Based on your assessment, select an insulation material suitable for your attic roof rafters, such as fiberglass batts, rigid foam boards, or spray foam. Consider factors like R-value, climate, and installation ease.
Step 3: Prepare the Attic
Ensure your attic is clean and clear of debris. Seal any air leaks around vents, pipes, or chimneys. Install rafter vents to maintain proper attic ventilation if necessary.
Step 4: Cut Insulation to Size
Measure your attic rafters and cut your chosen insulation material to fit snugly between them. If you’re using batts or rigid foam, a utility knife can help you cut clean, straight lines that match the dimensions of your rafter spacing.
Step 5: Begin Installing Insulation
Starting at the far end of the attic, fit the insulation between the rafters carefully. For foam boards and batts, ensure they fit snugly without compression. If you’re using spray foam, apply it evenly across the rafter surfaces.
Step 6: Secure the Insulation
For batts and rigid foam, use batt supports or wire fasteners to hold them in place against the rafters, if necessary. Spray foam typically adheres to the rafters as it expands and hardens.
Step 7: Install Additional Layers if Needed
Depending on your climate and the recommended R-value for your area, you may require additional insulation layers. Lay these perpendicularly across the first layer to cover the rafters and eliminate thermal bridging.
Step 8: Inspect and Complete the Job
Once all insulation is in place, inspect your work to ensure there are no gaps or compressions. Replace the attic access cover, and continue to monitor your attic periodically for maintaining proper insulation and ventilation over time.
Common DIY Insulation Mistakes to Avoid
DIY attic insulation can be a cost-effective way to improve your home’s energy efficiency, but it’s an area where mistakes are often made. The eagerness to complete a project can lead to overlooking key details that ensure the effectiveness of your insulation. Understanding these common pitfalls and how to avoid them is crucial in safeguarding your investment and achieving the desired energy-saving results.
Mistake 1: Inadequate Attic Inspection
Failing to thoroughly inspect your attic can lead to missed signs of moisture or air leaks, which compromise insulation performance. Ensure you examine every corner for potential issues before starting your insulation project.
Mistake 2: Choosing the Wrong Insulation Material
Selecting insulation without considering the specific R-value needed for your climate or the suitability for your attic space may result in suboptimal insulation. Research and select the material that meets your regional requirements and attic conditions.
Mistake 3: Poor Preparation and Cleaning
Neglecting to clean the attic of debris and dust before insulation can lead to a less secure fit and potential air quality issues. Clear the space and secure any loose wiring or plumbing to prepare for a smooth installation.
Mistake 4: Incorrect Insulation Measurement and Cutting
Cutting insulation without matching the precise dimensions of your rafter spacing can lead to gaps and thermal bridging. Measure twice and cut once to ensure a snug fit between the rafters.
Mistake 5: Overcompressing the Insulation
When fitting insulation, compressing it too much to make it fit can drastically reduce its insulating properties. Insert the insulation gently and avoid overpacking to maintain its effectiveness.
Mistake 6: Insufficient Securing of Insulation
Not securing your insulation properly can cause it to shift over time, creating uneven coverage. Use appropriate supports or fasteners to keep insulation firmly in place.
Mistake 7: Overlooking the Necessity for Additional Layers
Opting for a single layer of insulation without considering the recommended R-value for your area can lead to inadequate protection. Assess if additional layers are needed and apply them correctly to avoid heat loss.
Mistake 8: Neglecting Post-Installation Inspection
Skipping the final check for gaps or compression points can negate all your hard work. After you’ve laid the insulation, perform a meticulous inspection to ensure complete coverage.
By sidestepping these common errors, DIY enthusiasts can achieve a professional-quality insulation job that stands the test of time.
Installation Best Practices
Installing attic insulation is not just about the material; it’s also about precision and care during the installation process. It’s vital to ensure insulation fits snugly between the rafters without compressing it, as this can reduce its effectiveness. A well-installed insulation helps maintain a stable temperature throughout your home, leading to heightened comfort and potentially reduced energy costs over time.
Completing Your Attic Insulation Project
After installing the insulation, it’s important to check for any gaps or areas that may have been missed. Proper insulation without any voids can make a significant difference in the performance of your heating and cooling system. If you’re looking for assistance or assurance that your insulation is installed correctly, expert roofing services are just one call away to help you fine-tune your attic insulation project.